My Favorite Exercise Combinations: Installment 11 – Teaching the Weight Shift in Med Ball Drills

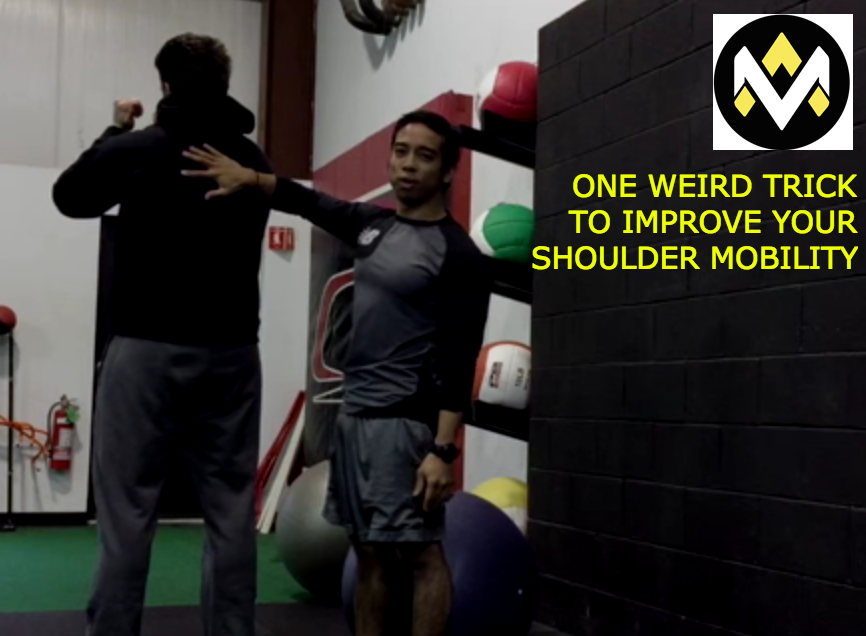
I love throwing medicine balls around in the gym. It’s loud and it makes my soul feel good. However, when I give this task to a youth athlete or use it for fat loss purposes, sometimes these medicine ball exercises go right over the person’s head (pun intended).

So with that in mind, I have an awesome combination for y’all today, and it is a great teaching tool for anyone from beginner to advanced athletes.

There are a lot of cool things going on here, and I’ll outline what happens in the first exercise in this combination:

A1. Lateral Mini-Band Walk with Pump Fake – 3×5/s

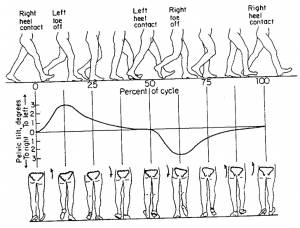
This first portion I liken to observing how gait patterns occur. Long story short, every time you take a step forward with one foot, you need to accelerate with the back foot.

Every time you take a step forward as well, you need to decelerate with the foot that has just left the ground.

Pelvis - Weight Shift

Integrating Ideas – Introducing the Lateral Mini-Band Walk

How does this integrate with a lateral mini-band walk?

You need to decelerate as you take a step to the side, and the “pump fake” with the medicine ball takes this necessity for deceleration to the next level. Otherwise, well, you’ll just fall over. Further, you need to accelerate away from the side on the other foot.

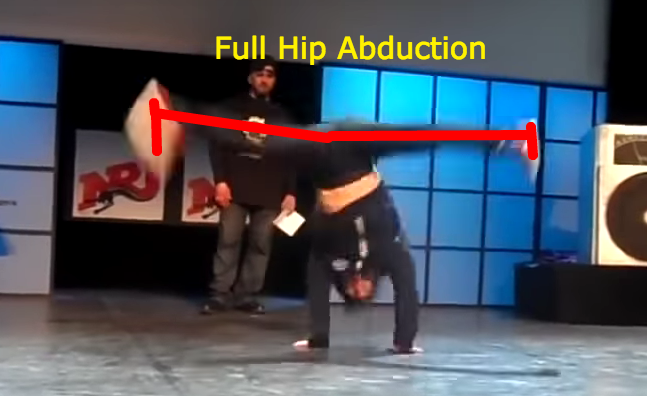
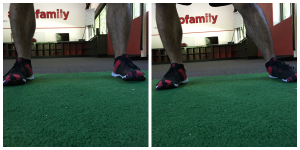
To take it the next level, you need to observe internal rotation at the femoralacetabular joint on the leg that is receiving the weight shift, which talks beautifully about deceleration, and then in order to re-accelerate you need to push out of that position at the hip, and go into external rotation (and hip abduction as well).

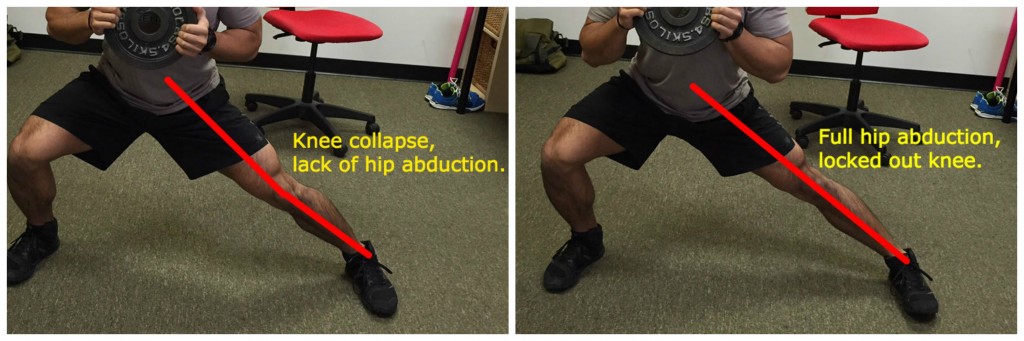
Over-coaching athletes to bring their knees into a position that is biased towards genu valgus may be incorrect – the correct position is to subconsciously cue hip internal rotation through external cuing. That is when you win.

qangle
Food for thought – males can also have large Q-Angles, not just females (and vice versa).

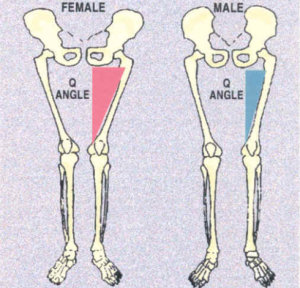
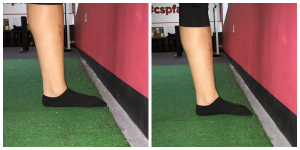
Further, this necessity for deceleration at the hip will also need to be translated up from the foot – so overpronation should not be observed, but rather staying on the ball of the foot. Overpronation can be thought of as having a flat foot position – there is no arch, and thus there is no force absorption, or rather there is no authentic and efficient force absorption (force is lost through the lack of an arch, and compensation may occur).

Arch vs No Arch
Flat Foot (Left) vs Arch (Right)

Now, to translate this to a sport specific lingo, what happens when you change directions? What happens when you need to re-direct any forces from one position to the next? What happens when you need to make a cut on a field?

Shuffle - Pronation + Valgus

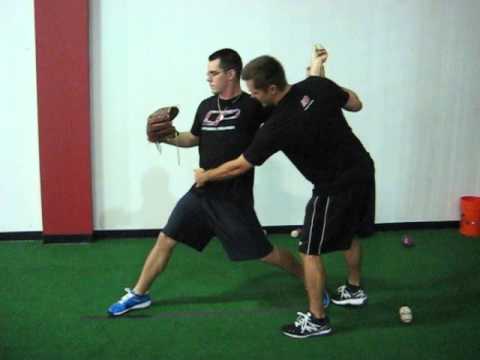
Now, with these ideas under your belt, you can go into the next exercise and teaching tool of shifting in and out with power and speed – the Step Back Rotational Med Ball Shotput.

A2. Step Back Rotational Med Ball Shotput – 3×5/s, 8lb to 10lb

In actuality this can be any side to side, or frontal plane, variation of a medicine ball exercise.

While this exercise may seem relatively straightforward, there are ways to move erroneously. From a cuing perspective, make sure to do these things:

  • Elbows high, imagine someone is behind you.
  • With your lead or front elbow, try to smack or hit the person behind you.
  • Show your shoulders and chest to the wall in front of you – this will avoid any sidearm like action from occuring.
  • Push the ground away from you – or place an object to step AWAY from, since you need a good follow through with your hips.
  • Break the wall with the ball, which should capture intent for power and speed of movement.

These are all the things that I’m looking for when utilizing a very simplistic drill involving medicine balls. Hope this brings some insight as to how I look at things!

As always,

Keep it funky.

MAsymbollogo

One Weird Trick: Installment 3 – Using Balls to Improve Shoulder Mobility

Many individuals have developed their whole careers to improving shoulder mobility. Before, the complexity of the shoulder girdle had plagued many individuals, whether it is from pain, dysfunction, or “I got this one really weird clicking thing that happens when I move like this,” type scenarios. I don’t claim to fix shoulders, but a funny thing happens when you do this one exercise called “Stir the Pot.”

Now, I’m not talking about stirring a pot of chili – although I would not be surprised that that is the origin of this exercise. In fact, when I first saw this exercise I thought it would be best called the cabbage patch, because of the circular nature of this exercise.
cabbage-patch

Wow what a throwback.

How Does The Cabbage Patch/Stir the Pot Exercise Help?

Well, thanks for asking Suzie. The first principle to respect involves understanding that sometimes shoulder mobility is limited due to positioning of joints, and activation of specific musculature.

If you find yourself in an extended posture, performing the Stir the Pot will certainly engage your anterior core if performed correctly.

The improvements from simply respecting antagonist and agonist relationships can see massive gains very quickly.

Positioning wise, improving your ability to activate your obliques will improve your positioning of your thoracic diaphragm. Bringing your “belt buckle up to your nose” will bring your pelvic floor/diaphragm into a better synchronous position with your upper body as well.

Scissor

Next, the interesting portion comes along with the circular motion of the shoulders and forearms on the ball. Interestingly enough, I believe that if done properly, you can achieve small ranges of motion into upward rotation of the scapula.

That is, if you can fix the thoracic diaphragm, and stabilize your upper body/ribcage, your scapulae will now have better ability to move upon this ribcage.

ShoulderMvmnt

Constant perturbations* from the unstable surface will require a reflexive maneuvering of specific musculature, namely the protractors, abductors, and even retractors and adductors of the scapulae as you perform your “stirring” motion.

Now you aren’t bringing your arms completely overhead obviously, but any improvements in range of motion in an overhead fashion will certainly translate to better motion overall, so you can hopefully do some really cool stuff, like handstands, overhead pressing, or even walking around with no discomfort.

Cues That Will Help

  1. Make sure to push chest and head away from the ground/ball.
  2. Improve motion by placing forearms directly into ball, not just elbows or just hands.
  3. Think of leading or creating small circles with your elbows.
  4. Keep a steady body as you perform this.
  5. Perform this exercise slowly – as you may not receive the same benefit if the exercise is performed in a fast and reactive manner.
  6. For beginners, try performing a stability ball stir the pot on the wall for a wall assisted and easier version.

As always,

Keep it funky.

MAsymbollogo

My Favorite Exercise Combinations – Installment 10

With athletes at Cressey Sports Performance in the thick of things during their winter break, I just wanted to drop a very quick and easy combination that I’ve been implementing that will enhance hip mobility, increase range of motion for athletes that are looking to improve their stride off the plate, along with challenging core stability.

Keep in mind that these same exercises can also be adjuncts or supplementary towards improving hip width during power moves in breakdancing, something that is necessary once you perform at a higher level.

AirFlare - Hip Abduction

When looking at things from a stride point of view in baseball, it is imperative to understand that there is dynamic motion in multiple planes, and a subsequent need for stabilization in multiple planes as well. Ignoring one plane of motion for another is shortsighted; only performing sagittal plane movements will ignore the necessary transfer of force into the frontal and traverse planes that are seen in baseball and many other rotary sports.

Matt Blake - Hips

At the same time, always improving motion in the frontal plane at the exclusion of training the sagittal plane will not be the best course of action either, because well, you just won’t get strong.

“Improving sagittal plane stability will often open up frontal plane mobility.”

I’ll let that sink in.

So with that under your belt, here are the following two exercises for improved hip mobility and stability!

Key Points

  • Determine end range for hip abduction, as each will have individual ranges of motion.
  • Push and spread the floor to activate glutes.
  • Stay tall through movement, and don’t allow head to fall into a forward head position.
  • Torso and head are stable, and arms move as you perform movement.

In essence, many individuals just assume the position, and either slack with positioning, either losing torso/ribcage position, head or eye position, or even not locking out their legs/glutes appropriately.

Key Points

  • Stay tall through movement, providing only a slight forward lean as necessary in order to accommodate the weight.
  • Maintain a tall neutral neck position (don’t go into cervical extension).
  • Make sure to sit back into hip flexion.
  • Heels will be in contact with the floor at all times, in order to maintain appropriate ankle, knee, hip alignment as you perform this movement.

This is a standard lateral lunge, holding a DB of desired weight in front of the body to make sure the reactive nature of the core is ensured.

What is being improved upon in this combination?

  1. Hip abduction (femurs moving away from the midline)
  2. Hip external rotation (stabilizing the pelvis by corkscrewing with your feet, tibia, and femoralacetbuluar angles)
  3. Internal and external oblique muscular stability as both exercise challenge anterior core stability, along with rotary stability being challenged in the anti-rotation chop.

Your brain is an easily fooled creature – you believe you are “tight”, but after performing these items your hip mobility can be improved upon through several mechanisms, namely reciprocal inhibition by activating the glute max and glute med (hip abductors)

If you are lacking in lower body range of motion, challenge yourself by really spreading the floor in the Wide Stance Anti-Rotation Cable Chop. Instead of leaving the idea of “wide stance” out for interpretation, challenge your hip mobility and push your limits!

Now, after completing one set on both sides, if you can ensure you are performing your lateral lunges to the next degree, make sure you are improving your range of motion by making sure your straight leg is really and truly straight.

Lateral Lunge

Don’t forget to lock out your knee on the “straight leg.”

Why You Should Include This Combination

One item to remember is that with many of our baseball athletes, I’d argue that this is also an “arm care” exercise – that is, by improving the ability of the lower body to move fluidly and absorb and adapt to stress, you are improving the ability for your athletes to move with more efficiency (and, to be more specific, have less issues biomechanically as you release the ball since you have more separation).

From a dance perspective, if you can open your hips up more, you will be placing less stress on your knees, as many dancers flex and extend rapidly at the knees in order to produce torque, instead of closing and opening their hips rapidly (which is naturally a greater source for force production).

Integrating This Combination

Within a programming scheme, I’d look at this towards a more complimentary or accessory exercise selection, perhaps performing this back to back in a circuit scenario in order to challenge the lower body musculature.

Perform this later on in the session, perhaps after your sagittal plane strength training has been performed already, as a secondary or tertiary exercise combination selection.

B1. Wide Stance Anti-Rotation Cable Chop – 3×8/side
B2. DB Goblet Lateral Lunge – 3×6/side

For weight selection for the DB Goblet Lateral Lunge, you can always choose a lighter weight, and go heavier after grooving a movement pattern. Don’t be afraid to go heavy (40 to 60+lbs) in order to challenge your anterior core more. If you are having difficulty with this exercise initially, start lighter or even bodyweight at first, and then seek to rapidly increase weight.

As you can see, there are multiple takeaways that you can introduce into many of your sport specific training methods that require a wide stance, or at the very least challenge the lower body musculature.

As always,

Keep it funky.

MAsymbollogo